Home › Canning guides
Water bath canning for beginners: step by step
Short answer: water bath canning is a safe way to preserve acid foods (pH 4.6 or lower) such as fruits, jams, jellies, pickles and tomatoes with added lemon juice or citric acid. Follow a tested recipe, keep at least 1 inch of boiling water over the jars, start the timer only when the water is at a full boil, and let the jars cool undisturbed for 12 to 24 hours. Low-acid foods like green beans, corn and meat need a pressure canner instead.
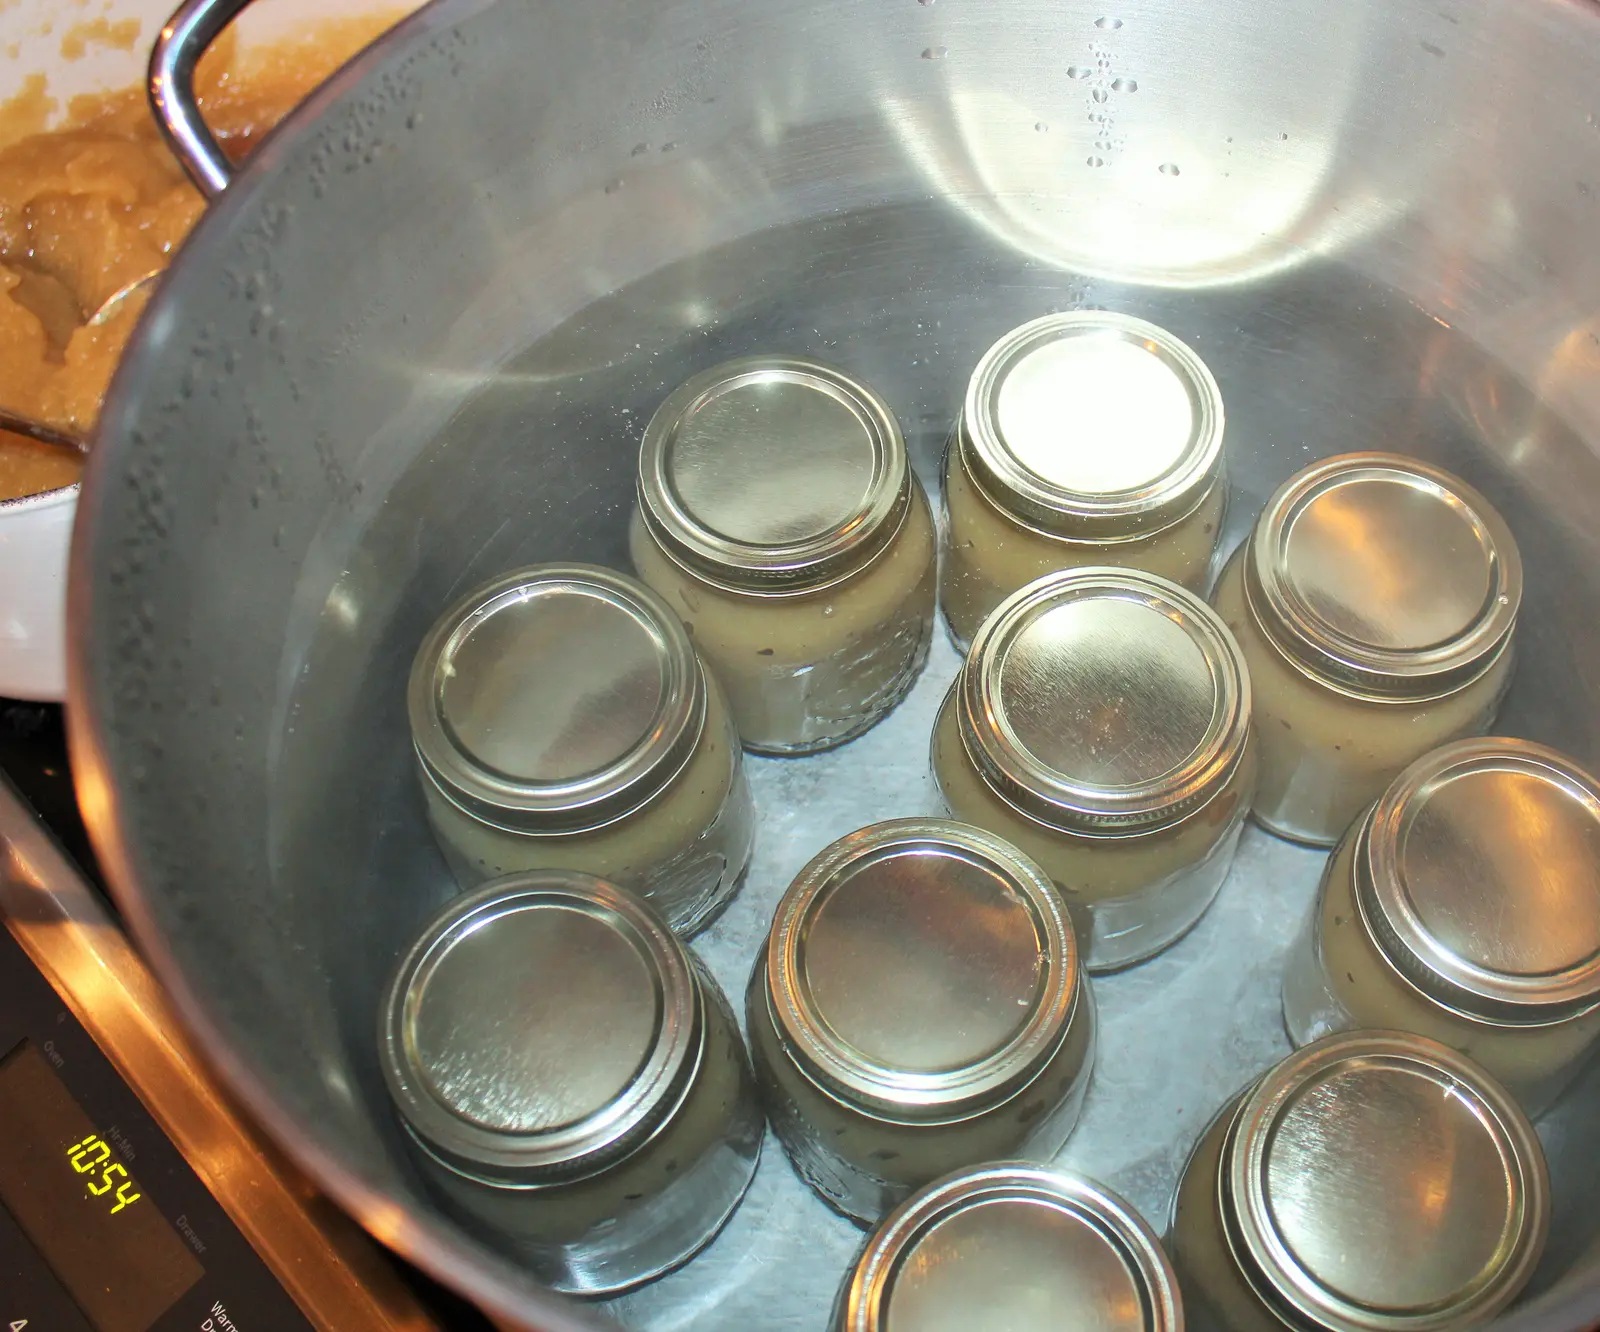
Water bath canning is mostly about doing a few things in the right order. Here is the method from the National Center for Home Food Preservation (NCHFP), broken into beginner-friendly steps.
First: is your food safe for a water bath?
A boiling water canner reaches about 212 °F at sea level. That's enough for acid foods, because acid keeps Clostridium botulinum spores from growing. NCHFP defines acid foods as those with a pH of 4.6 or lower. Low-acid foods (above 4.6) need the higher temperature of a pressure canner.
| OK in a water bath | Most fruits and fruit sauces, jams and jellies, pickles and relishes made from tested recipes, and tomatoes with added acid |
|---|---|
| Pressure canner only | Vegetables such as green beans, corn and potatoes, plus meat, poultry, fish and soups |
| Not at all | Foods with no tested home process, like dairy, rice and pasta, or thickened sauces. See our list of foods you shouldn't can at home. |
Tomatoes are the classic trap. NCHFP notes that some varieties have a pH slightly above 4.6, so tested recipes always add lemon juice or citric acid. Don't skip it.
What you need
- A canner or deep pot with a rack, deep enough for at least 1 inch of briskly boiling water over the jar tops.
- Canning jars, new flat lids and ring bands. Prepare the lids following the manufacturer's directions.
- A tested recipe from NCHFP, the USDA Complete Guide to Home Canning or your state extension service. It tells you the headspace, the pack and the processing time for your jar size.
- A jar lifter, a funnel and a plastic spatula (not metal) to release air bubbles.
Free printable: water bath or pressure canner?
One page with which foods go where, the "don't can" list, tomato acid amounts and pressure by elevation.
Get the free cheat sheet →Based on USDA guidance · printable PDF
Step by step
- Heat the water. Put the rack in the canner and fill it about halfway. NCHFP says to preheat the water to 140 °F for raw-packed food and 180 °F for hot-packed food, so the jars don't crack from a sudden temperature change.
- Get the jars ready. Wash them and keep them hot. Sterilize empty jars (boil 10 minutes, plus 1 minute per 1,000 ft above 1,000 ft) only when the processing time is under 10 minutes, as with some jams and jellies. Otherwise clean hot jars are enough.
- Fill the jars. Leave the headspace your recipe calls for. Slide the plastic spatula around the inside to release trapped air (not needed for jams, jellies or liquids), then adjust the headspace again.
- Wipe the rims and close. Clean each rim with a damp paper towel, set the lid on and screw the band on. Not too loose (liquid can escape) and not too tight (air can't vent).
- Load the canner. Use the jar lifter to set the jars upright on the rack. Add boiling water if needed until it's 1 inch above the jar tops (2 inches if the processing time is over 30 minutes).
- Bring it to a full boil, then start the timer. Turn the heat to high, put the canner lid on and wait for a vigorous boil; only then set the timer. You can lower the heat a little, as long as a gentle but complete boil continues.
- Watch the boil. If it stops at any point, bring it back up and restart the timing from the beginning. Add boiling water if the level drops.
- Finish gently. When time is up, turn off the heat, remove the canner lid and wait 5 minutes. Then lift the jars out with the jar lifter and set them upright on a towel, at least 1 inch apart, away from cold drafts.
- Leave them alone for 12 to 24 hours. Don't tighten the bands or press the lids while they cool. The "ping" you hear is the lids sealing.
Adjust for altitude
Water boils at a lower temperature as you go up. NCHFP warns that using sea-level times above 1,000 feet can lead to spoilage, so use the longer times in your recipe's elevation table.
Check the seals and store the jars
After cooling, remove the bands and press the center of each lid. If it springs back up, the jar didn't seal. A sealed lid is curved slightly down and doesn't move. Put unsealed jars in the refrigerator and use them within a few days, or reprocess them within 24 hours with a new lid, following NCHFP's directions.
Wash the sealed jars, label them with the contents and date, and store them without the bands in a clean, cool, dark, dry place. NCHFP recommends 50 to 70 °F for best quality, never above 95 °F, and canning only what you'll use within a year. If you're building a long-term pantry, our Lost SuperFoods review covers other storage methods worth knowing.
Frequently asked questions
Can I use a regular stockpot instead of a canner?
Yes, if it holds a rack and keeps at least 1 inch of briskly boiling water over the jars.
When exactly do I start the timer?
Only after the water over the jars reaches a vigorous boil. If the boil stops during processing, bring it back up and start the full time again.
Can I water bath vegetables if I boil them longer?
No. Low-acid vegetables need the higher temperature of a pressure canner. Extra boiling time in a water bath doesn't make them safe.
Sources (checked November 12, 2026): National Center for Home Food Preservation (nchfp.uga.edu): "Using Boiling Water Canners", "Ensuring Safe Canned Foods", "Sterilization of Empty Jars", "Recommended Jars and Lids", "Cooling Jars and Testing Jar Seals", "Storing Home Canned Foods" and "Selecting the Correct Processing Time"; USDA Complete Guide to Home Canning. This article is educational and is not affiliated with or endorsed by any government agency. Always follow a tested recipe for your food, jar size and elevation.
Free guide
10 healing herbs you can grow at home
Get our printable Backyard Herbal Starter Guide free: planting, harvesting and safety notes for chamomile, calendula, echinacea and more.